Showing posts with label jewelry. Show all posts

Thursday, January 3, 2013

Upcycled Jewelry Box [The Tutorial]

Hey Loves! I can’t believe it’s actually 2013! Has the new year been as good to you as it has to me? I sure hope so because I have a feeling it’s going to be a fabulous year not only for my blog but our my family and steady growing business as well :)
Remember a while back when I shared my upcycled jewelry box project with you guys? It was a WHILE back.. like 5+ months! Well, the before and after post was a total hit! I didn’t know how interested people would be in it or I would have posted the tutorial sooner. So here is the tutorial on how-to upcycle an old box into an adorable jewelry box!
step onestep one1step threestep fourstep fivestep sixstep sevenstep eight

XO

Before you leave, check out some other popular DIY tutorials:
     DIY Whimsical Chandelier cover
DSCF4100     DIY Message in a Bottle Necklace
     DIY New Years Feather Garland cove


Copyright © 2011-2013, SewCal Mama all rights reserved. Reproduction any content without prior written consent from SewCal Mama is prohibited.

Monday, September 24, 2012

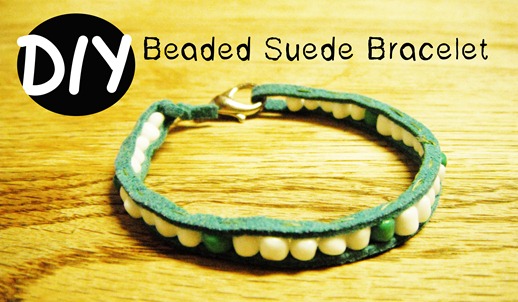
Live Laugh Craft | Volume 5: DIY Beaded Suede Bracelet

Good morning my lovely readers! It’s been two weeks since my last LLC post so this week I want to share a quick bracelet tutorial. Moe and I are both participating in a Fall Friendship Bracelet Swap so we thought that we would post a couple bracelet making tutorial in case some of the other ladies need inspiration.

I had fun designing this bracelet. It is a little time consuming because you have to sew each bead but it turns out really cute and the color and style possibilities are endless!
coversupplies

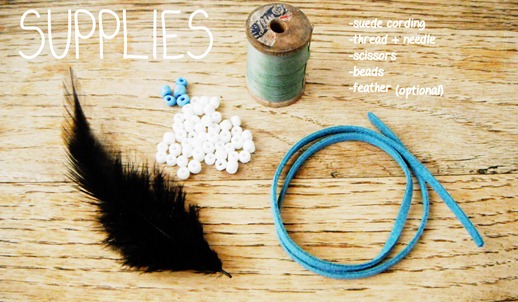
Supplies: Suede cording, thread and needle, scissors, beads (2 colors), feather (optional) and a clasp. I added the clasp after taking the supply picture. Then I ended up not using the feather because it was too much!

step

Make sure to leave a small space between the loop and the first bead that you sew. You are going to use the loop to secure your bracelet at the end.

step2

Sew your beads in using a pattern or unique styling of the beads. I did 5 white beads to every 1 aqua bead. Once your finished you can add a clasp or just tie it onto the loop.


Thank you for coming by today! Don’t forget to check out Moe’s bracelet tutorial, she is posting video tutorial this week! :D Also, if you are interested in participating in the Winter gift exchange, email me at sewcalmama@yahoo.com for early registration.

Friday, August 24, 2012

Fall Friendship Bracelet Swap

Good Morning, my loves. Today, I have some very exciting news for you.

bracelet
I am hosting the 2012 Fall Friendship Bracelet Swap! I loved using elfster for the Summer Handmade Gift Exchange so I thought I would host my own swap as well. The swap is easy peasy, just click the link below to find out more. 


Everyone is invited, so pass this link along!

The deadline for sign-ups is September 7th and the Swap will take place on or before September 28th. So, sign up and invite everyone you know! 

Hope you all have a great weekend!

PHOTO [1]


Sunday, August 12, 2012

DIY Sparrow Earrings

I hope you are all having an amazing weekend, I know I am! It’s been oddly calm and quiet around the Gibson house.. the last few days have consisted of crafts, movie watching, yummy food and water wars, what more could a Mama ask for?

I have an easy peasy earring tutorial for you today. I was debating on whether or not to post this due to the fact that it’s nearly effortless but they are just too cute to not show off!

I am not a big fan of chunky jewelry so I wanted these earring to be light and minimal.

cover photosuppliescharms

The most time consuming part (okay, it took me under a minute for both!) was linking the jump rings to the charms.

done

I planned on adding more beads but one on each side of the charm looked fine the way it was. What do you think?

hanging

I am now awaiting the perfect occasion to wear them. Maybe the first day of Fall semester? Ummm, Yes!

What do you like better, chunky or dainty jewelry?

Wednesday, August 8, 2012

DIY Message in a Bottle Necklace

I have a super sweet DIY photo tutorial for you today. It took me under 10 minutes to finish and all of the supplies were from my craft stash. I bought the tiny apothecary bottle from The Plaid Barn a few months ago and thought I’d put it to good use and make something with it. Plus, it totally goes with my recent beach & bohemian obsessions..
 
DSCF4100
loop and pinpin in corkquote
I love this quote, it has stuck with me through good times and bad.
roll itmessage goes infinish
There ya go, a pretty little message in a bottle.
If you have any questions about this specific photo tutorial or what to be involved in future DIY projects, drop me a line at sewcalmama@yahoo.com